Right Trapezoid Nursery Nightstand
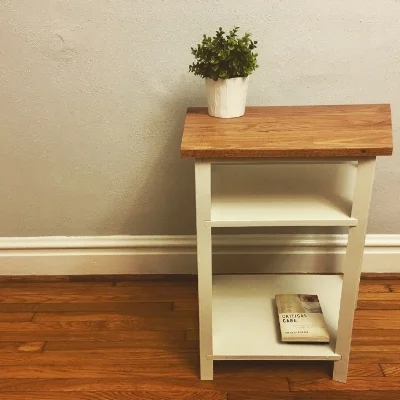
We have a space in the nursery between our swivel rocker and the twin bed where we hadn't been able to find a table we liked. We also wanted it to match the oak legs on the baby's crib so, I built my own.
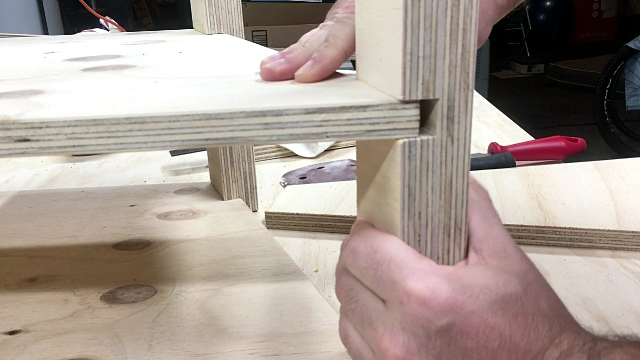
The table is built out of 3/4" plywood. The legs are layered in order to form dados for supporting the shelves. Each shelf is cut into a right trapezoid and the false top and legs support an oak top which is the same shape as the shelves. I came up with this design to maximize the space but still allow the chair to swivel and not bump into the table.
I started the process by ripping down 2x4' sheet of plywood into 4 feet x 3 inch strips which will later be trimmed down a bit.
The legs were cut down to size with a back layer and a front layer further cut down to the height of each shelf. Spacers were inserted for allowing the legs to be attached to the shelves using only glue. Each leg was glued up consecutively and a longer spacer was inserted to ensure uniform spacing of the shelving sections.
While the legs were drying I cut out the two shelves and the false top using a circular saw. As you can see below, I cut the board to the appropriate depth, then measured the I wanted the back width and measured the length of the front width. Then I used a straight edge to connect the two measurements. I lined up a cutting guide for my circular saw and ripped two of the shelves down.
I have no idea as to the angle of this side so, I used the off cut as a guide to make the cut for the final shelf.
*Note the choice of woodworking footwear.
I have all the piece cut and glued, the only thing left to do is attach them together.
I started off with the top shelf or false top and glued and clamped two diagonal legs to it and followed it up with a few brad nails from my nail gun. After the first two legs were on, I slide in the remaining shelves, then glued and nailed the rest of the legs. In the video link, I discuss what to do in the event one of the laminated pieces on the legs moves during the glue up. One "dado" was too narrow and I need to deal with it.
Now, for the top portion...
The top is made from 4/4 oak. I used three pieces which were all ripped down to 6 inches wide. I marked a rough angle of the side so I'd know where I need to make my cross cuts. It was just a matter of gluing the three pieces together and using the offcut from before to cut the top to size. It will overhang the false top by about 2 inches on each side.
The finish for the top was a very big deal for my wife. Polyurethane or Polycrylic seems to smell for about a month sometimes. So, I found a zero VOC varnish made by a company called Tried and True. It's a bit of a pain to apply since each coat has to be rubbed dry, left to cure for 24 hours, then "sanded" with fine steel wool before applying the next coat. Although, after seeing the results, I think it's worth it.
And finally it was time to attach the top to the base..which was painted white...with some wood glue and two screws driven in through the bottom of the false top.
The final resting place for the table in the nursery

